---
title: Home
source: https://infrared.city/docs/sdk/1.1/
---
# Infrared SDK
The Infrared SDK runs urban microclimate simulations on your own site model:
wind, sun, thermal comfort and daylight. You use it from Python or
TypeScript. A .NET SDK is coming. The SDK prepares the work on your machine.
The Infrared cloud runs only the simulation models.

## What goes in, what comes out
**In:** an area (one polygon), your model, weather and a time period.
Your model has buildings, trees, ground materials, terrain and context
geometry. Context geometry is far objects that only give shade. See
[Your model](#your-inputs). You can also bring your own sensor points
(see [Bring your own sensors](#bring-your-own-sensors)).
**Out:** ground maps, values on facades and roofs, values in rooms, and one
value for each sensor point that you give. See
[Results](#what-comes-back) and the [ten analyses](#the-ten-analyses).
## How people use it
Pick the case that is closest to yours. Each line shows what to read next.
| You want to | Typical setup | Read next |
|---|---|---|
| Compare design variants | Python in a notebook, your own model | [How a run works](#how-a-run-works), [Your inputs](#your-inputs), [What comes back](#what-comes-back) |
| Show results in a web app | TypeScript in the browser, one SDK worker | [Where it runs](#where-it-runs), [Serve many users](#serve-many-users), [Facades and roofs](#facade-and-roof-runs) |
| Run many sites | Python or Node.js on a server, a script | [Tiling](#tiling), [Cost and failures](#cost-and-retry) |
| Work in Rhino or Grasshopper | Rhino 8 with the Python SDK (plug-in: work in progress) | [Coordinates](#coordinates), [Your inputs](#your-inputs) |
The chapters up to "The ten analyses" explain the concepts. The chapters after
them are deep dives: read them when you need them.
## The Rust core
One compiled core does the local work: tiles, geometry preparation, merge,
and the run engine. The engine decides every send, status check, download
and retry. Python and TypeScript only do the network calls. The Python wheel and the TypeScript package share this core. The .NET
SDK will share it too. All SDKs give the same results, and the local
preparation is fast. See [How a run works](#how-a-run-works).
## Measured numbers
Measured with the Python SDK 1.0.0 from PyPI on the production API, on a
32-core machine. The buildings were read before the timer. "Warm" is the
second run of the same request: the models are warm and the geometry is
already uploaded.
- **Total time**: the full SDK call. It plans the tiles, prepares the site,
and uploads, submits, checks, downloads and merges while other tiles are
still on their way.
- **Cloud part**: from the first job accepted to all jobs done (queue and
simulation).
| Area | Analysis | Total time | Cloud part |
|---|---|---|---|
| **40 km²**, Hong Kong (24,444 buildings) | Sky view factor on the ground: 1 m grid, 169 tiles | **8.2 s** warm (14.8 s first run, with a 24 MB upload) | 7.3 s |
| **6 km²**, Hong Kong (3,440 buildings) | Solar radiation on facades, June 08–18 h: 2.8 million sensors, 27 jobs | **2.7 s** warm (3.9 s first run) | 2.0 s |
| **6 km²**, Hong Kong (3,440 buildings) | Sky view factor on facades: 2.8 million sensors, 27 jobs | **2.6 s** warm (4.0 s first run) | 2.0 s |
| **6 km²**, Hong Kong (3,440 buildings) | Sky view factor on the ground: 1 m grid, 25 tiles | **3.3 s** warm (8.5 s cold) | 3.0 s |
| **1 km²**, Vienna (4,212 buildings) | Sky view factor, wind speed and UTCI in one call | 8.7 s | first job after 2.9 s |
The largest run used less than 2 GB of memory on the machine.
!!! info "Compared with 1.0.0"
Measured on the production API against 1.0.0. Results are the same, value
for value.
- **Faster:** on the large and many-site cases we measured, about 10 to
25 %. Small 1 km² runs take about the same time. A small-site loop takes
12 to 15 % less time for each site, and about 2.7 s of each site is
server compute. A merge of 1,117 jobs takes 25 % less time. A 10 km²
run on a 20/10 Mbit line takes 16 to 25 % less time.
- **First result sooner:** the stream gives the first result of a 10 km²
TypeScript run after 9.5 to 10.3 s, not after 11 to 12 s.
- **Fast line:** the cloud models set the time. The SDK adds little.
- **Slow line:** upload time sets the time. Each tile goes out as soon as
its upload is done (in a batch submit with the other ready jobs), so
the simulations start early. A repeat run with a `geometryUrlStore`
uploads nothing.
- **Unstable line:** a send with no answer goes again with the same key,
a status request that fails is asked again, and no job is lost or runs
two times.
Dates: Hong Kong 2026-10-08, Vienna 2026-10-07. Your times depend on your
network, your machine and your site.
## Install
=== "Python"
```bash
pip install infrared-sdk
pip install "infrared-sdk[geodata]" # only to read Overture Maps
```
Python 3.9 or later. The package is `infrared-sdk` on PyPI.
=== "TypeScript"
```bash
npm install @infrared-city/infrared-sdk
npm install hyparquet hyparquet-compressors # only to read Overture Maps
```
Node 18 or later. The package is `@infrared-city/infrared-sdk` on npm.
!!! warning "An old .npmrc sends npm to the wrong registry"
If an `.npmrc` maps `@infrared-city` to GitHub Packages, `npm install`
looks for the package there and does not find a stable version. Stable
versions, from 1.0.1, are on npmjs.org, not on GitHub Packages. This
also applies to the `.npmrc` in your home directory (`~/.npmrc`): it
applies to all your projects. To see the registry that npm uses, run
`npm config get @infrared-city:registry`. The correct output is
`undefined` (npm then uses npmjs.org). If it shows
`https://npm.pkg.github.com`, remove the `@infrared-city:registry` line
from the project `.npmrc` and from `~/.npmrc`. You need no token for
npmjs.org.
## Quickstart
This run uses your own geometry: one box-shaped tower, in metres, with the
origin at the south-west corner of the area. `my_tower` is a placeholder.
=== "Python"
```python
import os
from infrared_sdk import InfraredClient, SvfModelRequest
from infrared_sdk.analyses.types import AnalysesName
lon, lat = 16.371, 48.208
polygon = {"type": "Polygon", "coordinates": [[
[lon, lat], [lon + 0.004, lat], [lon + 0.004, lat + 0.003],
[lon, lat + 0.003], [lon, lat]]]}
xy = [(100, 100), (120, 100), (120, 120), (100, 120)]
coordinates = [c for z in (0, 30) for x, y in xy for c in (x, y, z)]
indices = [0,2,1, 0,3,2, 4,5,6, 4,6,7, 0,1,5, 0,5,4,
1,2,6, 1,6,5, 2,3,7, 2,7,6, 3,0,4, 3,4,7]
my_tower = {"tower": {"coordinates": coordinates, "indices": indices}}
client = InfraredClient(api_key=os.environ["INFRARED_API_KEY"])
payload = SvfModelRequest(analysis_type=AnalysesName.sky_view_factors)
result = client.run_area_and_wait(payload, polygon, buildings=my_tower)
grid = result.physical_grid() # sky view factor, 0 to 100 %
```
The SDK writes INFO log lines, for example the default base URL. This is normal.
=== "TypeScript"
Save this as `quickstart.ts` and run it with `npx tsx quickstart.ts`. It is
an ES module. Set `"type": "module"` in `package.json` for top-level `await`.
```ts
import { InfraredClient, initializeCore, areaGridValuesF32, type AreaResult } from "@infrared-city/infrared-sdk";
await initializeCore();
const lon = 16.371, lat = 48.208;
const polygon = { type: "Polygon", coordinates: [[
[lon, lat], [lon + 0.004, lat], [lon + 0.004, lat + 0.003],
[lon, lat + 0.003], [lon, lat]]] };
const xy = [[100, 100], [120, 100], [120, 120], [100, 120]];
const coordinates = [0, 30].flatMap((z) => xy.flatMap(([x, y]) => [x, y, z]));
const indices = [0,2,1, 0,3,2, 4,5,6, 4,6,7, 0,1,5, 0,5,4,
1,2,6, 1,6,5, 2,3,7, 2,7,6, 3,0,4, 3,4,7];
const client = new InfraredClient({ apiKey: process.env.INFRARED_API_KEY });
const result = await client.runAreaAndWait(
{ analysisType: "sky-view-factors" }, polygon,
{ buildings: { tower: { coordinates, indices } } },
);
const grid = areaGridValuesF32(result as AreaResult); // 0 to 100 %
```
No data yet? The SDK can read public buildings, trees and ground materials
for an area. See [Your model](#your-inputs).
## Versions
- Each SDK has its own SemVer version. Python starts at 1.0.0 and TypeScript at 1.0.1. Their versions can differ later.
- A major version can change the API. Read `UPGRADING.md` before you upgrade.
- Pin the version in your project.
## How a run works
You give an area, your geometry and the analyses. The SDK on your machine
cuts the area into tiles, sends one job for each tile to the Infrared cloud
and merges the tile results. The cloud runs only the simulation models.
A run engine in the Rust core decides every send, status check, download
and retry. Python and TypeScript only do the network calls and the threads.
You get the result of each analysis as soon as its last tile is merged, or
all results at the end.

### The inputs
- **Area**: one GeoJSON polygon in WGS84 (`[lon, lat]`).
- **Your geometry**: buildings, trees, ground materials, terrain, and context
geometry. Context geometry is far objects that only give shade. The SDK
does not analyse it. Only the sun and light analyses and the interior models take
it, and it reaches 128 m past a tile.
- **Weather**: a weather file or a public weather station, and the time
period.
- **Analyses**: one analysis or a list of analyses for the same area.
- **Sensors** (optional): the ground grid is the default. You can ask for
sensors on facades and roofs (`analysis_surfaces`). Or give your own
sensor points. Own points run as one job, not as an area run. See
[Bring your own sensors](#bring-your-own-sensors).
Use your own data. To start fast, you can also read public data for the area
with the SDK.
### The steps
1. **Plan the tiles.** The SDK cuts the area into tiles of 512 m. All
analyses except wind read 128 m of geometry past each tile. Wind analyses
move 256 m from tile to tile, so the tiles overlap by half. The SDK skips
empty tiles. One run has a maximum of 100 tiles.
2. **Prepare the geometry.** The SDK prepares the site one time. Then it
cuts your geometry for each tile.
3. **Upload the geometry.** The SDK uploads the geometry of each tile one
time. All analyses on that tile use the same upload: ground and facade
analyses share it. Wind analyses use their own tile grid, so they upload
their own tiles. With a
`geometryUrlStore` (TypeScript), a repeat run of the same area uploads
nothing.
4. **Submit the jobs.** The SDK sends the jobs tile by tile, across all
analyses. A tile goes out as soon as its upload is done. Each job has an
idempotency key. If a submit gets no answer, the SDK sends it again with
the same key: the job does not run or bill two times. A job that failed
on the server is sent again as a new job, with a new key.
On the binary transport, when the server offers it, the SDK sends the
ready jobs together: up to 100 jobs (5 MiB) in one batch submit, at most
5 batches at the same time. A batch goes out as soon as a slot is free;
the first jobs do not wait for a full batch. Each job in a batch keeps
its own key and its own charge, and the rules above stay the same for
each job. A job the batch does not take is sent alone. To send one
request per job, pass `batch_submit=False` (Python) or
`batchSubmit: false` (TypeScript) to the client.
5. **Wait.** The SDK asks for the job status while it still sends. The first
check is 0.5 s after the first job is accepted; a job accepted later is
asked in the next check. Then one request asks for the status of up
to 50 jobs: every 0.25 s up to 4 s, every 0.5 s up to 10 s, then every
2 s. So 81 jobs need 2 requests for each check, not 81. A check sends
at most 8 of these requests each second, so a check of up to 400 jobs
keeps this rhythm. Without the batched route, the SDK asks for each job
with at most 2 requests each second. A status request that fails is asked again.
6. **Download the results.** The SDK downloads each result when its job is
done, while other jobs still run and while uploads continue. The results
come back in a binary format by default.
7. **Merge.** The SDK joins the tiles on your machine. It merges each result
when its download is complete, in the background. An analysis is ready
when its last tile is merged. Wind tiles are blended in the core at the
end of the analysis.
Steps 2 to 7 do not wait for each other. Each tile goes on as soon as it is
ready. The engine sets how many requests run at the same time (32 submits,
or 5 batch submits, 16 status requests, 13 downloads). This is not a limit on the jobs that run
in the cloud: more jobs can run at the same time. Python and TypeScript work
the same way. `max_workers` (`maxWorkers`) has no effect and is deprecated.
### Get each result when it is ready
If you run more than one analysis, you do not have to wait for the last one.
`run_area_iter` (`runAreaStream`) gives each analysis when its last tile is
merged. The order is the order in which they finish, not the order of your
list. Each item has the `index` in your list, the analysis type, and the
`result` or an `error`. A failed analysis is an item with an error: the
others continue. The SDK keeps no reference to a result after it gives it to
you, and it frees the tile bodies and the merge buffer of each finished
analysis, so read the items one by one. At most two analyses of one run, and
six over all runs in one process, merge at the same time. An analysis frees its slot when you
take its item, so a stream that you stop reading (and do not close) makes
other runs wait. If you leave the loop early, the run
stops and sends no more tiles. Jobs that the cloud has already accepted are
not cancelled.
=== "Python"
```python
for item in client.run_area_iter([solar, wind], polygon, buildings=buildings):
if item.error is None:
draw(item.index, item.result)
```
=== "TypeScript"
```ts
for await (const item of client.runAreaStream([solar, wind], polygon, { buildings })) {
if (item.error === undefined) draw(item.index, item.result);
}
```
`run_area_and_wait` (`runAreaAndWait`) gives all results at the end. Give it
the list of analyses: ONE call runs them as one run. They share the prepared
site and each facade tile's parts, and you get one result for each analysis,
in the order of your list. If an analysis fails, the call throws the first
error in list order after the others are finished. Do not make one call for
each analysis: each call prepares the site again.
=== "Python"
```python
solar_result, wind_result = client.run_area_and_wait([solar, wind], polygon, buildings=buildings)
```
=== "TypeScript"
```ts
const [solarResult, windResult] = await client.runAreaAndWait([solar, wind], polygon, { buildings });
```
`run_area` (`runArea`) also takes a list and gives one schedule for each
analysis. Stream and wait use the default wind merge. For the directional blend, use
`run_area` (`runArea`) and `merge_area_jobs` (`mergeAreaJobs`) with a
`strategy`. `retry_from` (`retryFrom`) is not an option of the stream or of a
list: retry each analysis alone with `run_area` (`runArea`). In Python,
`merge_area_jobs` also takes the list of schedules and gives a list of results
in the same order; in TypeScript, merge one schedule at a time.
To stop a stream early in Python, leave the loop (`break`) or call `close()` on
the object `run_area_iter` returns; `close()` is safe from any thread, and a
loop that waits for an item then ends. In TypeScript, use `signal`.
### When a tile fails
A failed tile does not stop the other tiles. The SDK never gives you a
result with holes. In `run_area_and_wait` (`runAreaAndWait`) and in the
stream, the engine sends a failed tile again as a new job, one time by
default (`retries=1`). If a tile still fails, an analysis with a missing
tile gives an error and no result. `run_area_and_wait` raises an error that
names the tiles (Python: `AreaRunError`, with `failed_tiles`). The stream
gives an item with `error`. A status answer 401 or 403 stops the run. For
`run_area` (`runArea`) and the retry keys, read [Cost and retry](#cost-and-retry).
### Example: one run
=== "Python"
```python
import os
from infrared_sdk import InfraredClient, parse_epw
from infrared_sdk.analyses.types import (
AnalysesName, UtciModelBaseRequest, UtciModelRequest,
)
from infrared_sdk.models import Location, TimePeriod
client = InfraredClient(api_key=os.environ["INFRARED_API_KEY"])
payload = UtciModelRequest.from_weatherfile_payload(
payload=UtciModelBaseRequest(analysis_type=AnalysesName.thermal_comfort_index),
location=Location(latitude=48.21, longitude=16.37),
time_period=TimePeriod(start_month=7, start_day=15, start_hour=12,
end_month=7, end_day=15, end_hour=16),
weather_data=parse_epw("vienna.epw"),
)
result = client.run_area_and_wait(
payload, polygon,
buildings=buildings, # your meshes, in metres
vegetation=trees, # your trees
ground_materials=ground, # your ground layers
)
```
=== "TypeScript"
```ts
import { InfraredClient, initializeCore } from "@infrared-city/infrared-sdk";
await initializeCore();
const client = new InfraredClient({ apiKey: process.env.INFRARED_API_KEY });
const result = await client.runAreaAndWait(
{
analysisType: "thermal-comfort-index",
latitude: 48.21, longitude: 16.37,
dateFilters: { period: { start: { month: 7, day: 15, hour: 12 },
end: { month: 7, day: 15, hour: 16 } } },
weather: client.weather.parseEpw(epwText),
},
polygon,
{ buildings, vegetation: trees, groundMaterials: ground },
);
```
Terrain goes in the analysis request as `ground_geometry` (`groundGeometry`).
Context geometry goes in the request of a ray-traced solar or interior
analysis as `context_geometry` (`contextGeometry`).
#### Reference
- Python: [the client](python/sdk.md), `run_area_and_wait` and `run_area`.
- TypeScript: [the SDK reference](api/typescript/index.md),
`InfraredClient.runAreaAndWait` and `InfraredClient.runArea`.
## Coordinates
You give the area as a polygon in lon/lat. You give your geometry in metres.
The SDK moves every layer into the frame of each tile. Most wrong results
come from a wrong frame, so read this page once.

### The rules
1. **The area is a polygon in lon/lat** (WGS84, `[lon, lat]`). Use one ring,
no holes, no self-crossing.
2. **The south-west corner of its bounding box is the origin** (0, 0, 0) of
your model: the smallest lon and the smallest lat.
3. **Your model is in metres.** x is east, y is north, z is up. z is the
height above the ground.
4. **Keep every coordinate below 100,000 m** in size (absolute value). Do
not send UTM or other absolute coordinates. The SDK refuses them.
5. **Trees and ground materials are in lon/lat**, not in metres.
Buildings, terrain and context geometry share the metre frame.
### The SDK moves it for you
Each tile has its own frame. The SDK moves every metre layer from the site
frame into each tile frame. You do not do this.
A bare `buildings` map has no frame. The SDK reads it as "already in the
frame of the run polygon". An acquired buildings object keeps its origin.
So pass the object that you got:
- You get buildings for polygon A and run polygon B with the bare map: the
whole city moves by the distance between the two south-west corners.
- You pass the acquired object: the SDK moves it from its own origin. One
acquisition for a large polygon can serve several smaller runs.
### What the SDK refuses
The SDK stops with an error, before you pay, when:
- the polygon is wrong, or a coordinate is not finite;
- a mesh has no `indices`;
- a ground layer name is unknown, or a terrain sheet is wrong;
- a tile coordinate is 100,000 m or more;
- you give more than 300,000 own sensor points.
### Silent traps
The SDK does **not** catch these. The run is billed and the result is wrong.
| Trap | What happens |
|---|---|
| **Lat and lon swapped** | The SDK refuses a latitude above 90 in size. So it catches the swap in places like Tokyo or Sydney. It is silent for most of Europe and the Americas. |
| **Y-up model** | Many tools use y as height. The SDK needs z up. |
| **Centimetres** (or feet) | The SDK reads every number as metres. |
| **Origin at the polygon centre** | The origin must be the south-west corner of the bounding box. |
| **Open meshes** | A building needs a closed solid with a bottom face. A mesh with holes or without a bottom face gives wrong shade. |
Check your model in a viewer before you run. A building that stands at the
right place and has the right height is a good sign.
### Example: coordinates
=== "Python"
```python
buildings = client.buildings.get_area(polygon) # keeps its origin
result = client.run_area_and_wait(
payload, polygon,
buildings=buildings, # pass the object, not buildings.buildings
)
```
=== "TypeScript"
```ts
const buildings = await client.buildings.getBuildingsInArea(polygon);
const result = await client.runAreaAndWait(
request, polygon,
{ buildings }, // pass the object, not its inner map
);
```
#### Learn more
- [Your inputs](#your-inputs): all the layers and the weather.
- [How a run works](#how-a-run-works): the tiles and the steps.
- Python: [the client](python/sdk.md). TypeScript:
[the SDK reference](api/typescript/index.md).
## Tiling
The SDK cuts your area into square tiles. It sends one job for each tile.
Tiles are 512 m wide. The step from tile to tile depends on the analysis.
This page shows how the grid looks and what it means for your results.

### Two tile families
- **Solar family**: all tiled analyses except wind. The step is 512 m, so
tiles do not overlap. Each tile also reads geometry 128 m past its edge.
- **Wind family**: wind speed and pedestrian wind comfort. The step is 256 m,
so neighbour tiles overlap by 50 % each way. Wind tiles read no extra
margin.
Each family has its own grid. Analyses of one family share it. A run with
a solar analysis and a wind analysis uses both grids.
### Empty tiles and the tile limit
- A tile that does not touch your area is empty. The SDK skips it and sends
no job.
- One run has a maximum of 100 non-empty tiles. A larger area needs an
explicit yes: `max_tiles_override` (`maxTilesOverride`).
### How the tiles join
Wind tiles overlap, so the SDK must choose which values to keep.
- **Default**: the SDK keeps the centre 256 m of each tile. The centres fit
together with no gap. The core joins the wind tiles at the end of the
analysis.
- **Directional blend**: an option for wind speed only. It needs the wind
direction. Use `run_area` (`runArea`) and then `merge_area_jobs` with
`strategy="directional_blend"` and `wind_direction_deg` (TypeScript:
`strategy`, `windDirectionDeg`). `run_area_and_wait`, `run_area_iter` and
`runAreaStream` use the default merge.
### Far shading
A tile job holds your `buildings` up to 128 m past the tile edge. Wind tiles
have a margin of 0 m.
- A tower in the margin is part of the job. Its shadow falls on the tile and
the result counts it.
- A tall building in `buildings` farther away is not part of the job. Its
shadow is missing from the result. The run gives no error.
- Put far objects that give shade in `context_geometry` (`contextGeometry`).
Only the ray-traced solar models and the interior models take it. A mesh
goes into each tile job when it stands less than `context_reach_m`
(`contextReachM`) outside the tile: a square box, tile ± reach. The default
is 600 m. A number must be larger than the tile margin plus the buffer
below.
- `context_reach_m=None` (`contextReachM: null`) sends every context mesh to
every tile job. Use it when you choose the context for the site yourself.
- A mesh farther out than the reach is not sent, and the SDK logs its id.
- No context goes into the tile's detailed area plus a 10 m buffer
(`context_buffer_m`, `contextBufferM`; 0 = no extra buffer): the context
triangles in that area are removed from that tile job, and the rest of
each mesh stays. A tile job carries at most 250,000 context triangles.
**Advice:** give far geometry as sparse, low-poly shapes. Each mesh costs
upload size once for each tile that holds it.
### Example: preview tiles
Count the tiles of each family before you run. This sends no job.
=== "Python"
```python
solar = client.preview_area(polygon, analysis_type="solar-radiation")
wind = client.preview_area(polygon, analysis_type="wind-speed")
print(solar.tile_count, wind.tile_count) # wind: about 4 times more
```
=== "TypeScript"
```ts
const solar = await client.previewArea(polygon, { analysisType: "solar-radiation" });
const wind = await client.previewArea(polygon, { analysisType: "wind-speed" });
console.log(solar.tileCount, wind.tileCount); // wind: about 4 times more
```
#### Learn more
- [How a run works](#how-a-run-works)
- [Cost and retry](#cost-and-retry): how tiles become jobs and cost.
- Python: [the client](python/sdk.md), `preview_area`.
- TypeScript: [the SDK reference](api/typescript/index.md), `InfraredClient.previewArea`.
## Your inputs
Your own model is the normal input. Give the layers that you have. Each layer
has a fixed shape. Weather and a time period come on top.

### Your model, layer by layer
- **Buildings**: closed meshes `{id: {coordinates, indices}}` in metres
(x east, y north, z up). Each building is one closed solid with a bottom
face. All outdoor analyses read
them. Facade and roof sensors come from them.
- **Trees**: `{id: GeoJSON Point}` in lon/lat, with `genus`, `height` and
`crownDiameter` (metres). The `genus` sets the crown shape. Height and
diameter are optional: a tree with none gets 6 m height and 4 m crown, and
gives no warning. An unknown `genus` is a broadleaf tree. A point can have a
height: `[lon, lat, z]`, with `z` in metres in the frame of the buildings and
the terrain. Under `terrain_alignment` `"as-is"` the tree stands at its `z`.
The other modes do not use `z`. Under `"as-is"` with terrain, a tree with no
`z` stands at z = 0, and the SDK logs one warning with the count.
- **Ground materials**: one GeoJSON FeatureCollection in lon/lat for each
layer: `asphalt`, `concrete`, `soil`, `vegetation`, `water`. An unknown
layer name is an error. Only the thermal comfort analyses read them.
- **Terrain**: a triangle mesh in the frame of the buildings, in
`ground_geometry` (`groundGeometry`). There is no input for a height map:
make a mesh first. Maximum 500,000 triangles in one request. `terrain_alignment`
sets how your buildings and trees meet it: `"as-is"` (default),
`"auto-align"` or `"assume-aligned"`. Wind analyses refuse terrain.
- **Context geometry**: far objects that only give shade, in
`context_geometry` (`contextGeometry`). The SDK does not analyse them.
The four sun and light analyses and the interior models take them. Wind
and thermal comfort do not. A request with context geometry also needs
terrain, facade or roof sensors, or your own sensor points: on its own it
is refused.
Meshes are in metres. See [Coordinates](#coordinates) for the frame.
### Context geometry: the reach and the hole
A context mesh goes to a tile job when it stands less than
`context_reach_m` (`contextReachM`) outside that tile. The default is
600 m. An object that is farther away is not sent: it gives no shadow and
**no error** (the SDK logs its id). `None` (`null`) sends every mesh to
every tile job. A number must be larger than the tile margin plus the buffer
below (138 m for the sun and light analyses with the default buffer): a
smaller reach is an error.
Each tile job already holds your detailed `buildings` up to the tile margin
(128 m for the sun and light analyses). Context is not sent in that area plus
a buffer of `context_buffer_m` (`contextBufferM`, default 10 m), so context
never overlaps your detailed buildings.
**When you pass your own `buildings`, give them for every tile plus the tile
margin (128 m).** The tiles cover the site in steps of 512 m, so this area
can reach past the site edge. It is the area the SDK reads when you pass no
buildings. Context geometry is only for what is outside that area: a
building that is only in the context and stands in a tile or its margin is
removed from that tile job, and nothing replaces it.
- The context **triangles** in this area are removed from that tile job; the
rest of each mesh stays. So a merged city mesh, or a sheet like
`ground_geometry` given as context, keeps its parts outside the area. The
SDK logs one warning with the count: put close neighbours in `buildings`.
- `context_buffer_m=0` (`contextBufferM: 0`) removes only the tile and its
margin.
- Your `ground_geometry` is separate: the SDK cuts it per triangle for each
tile, as before.
- A context mesh with no readable coordinates (empty, or NaN) stops the run
before any job, with an error that names the mesh.
A tile job carries at most 250,000 context triangles. Above that the run
stops with an error that names the count. A longer reach sends each mesh to
more tile jobs, so keep far geometry sparse and low-poly: simple blocks for
far buildings and hills; `simplify_meshes` (`simplifyMeshes`) makes a mesh
coarser (see below).
### Make geometry light: weld, simplify, export
Context geometry gives shade only, within `context_reach_m` (above). A
detailed model costs upload bytes in every tile job it reaches and gives
almost the same shadow. The same holds for a detailed terrain: give terrain
as `ground_geometry` (`groundGeometry`, at most 500,000 triangles) and far
objects as `context_geometry` (`contextGeometry`). Make both light once:
weld, simplify, look at the result, and pass it straight in. Each step
takes a whole geometry dict in one call (for one mesh, a dict with one
entry), and each mesh stays a separate mesh. Weld and simplify return the
dict as flat arrays (`geometry`) and the counts per mesh (`report`):
triangles and vertices in and out, and the simplifier's error.
1. **Weld**: `weld_meshes` (`weldMeshes`). Many exports (Grasshopper,
Rhino) write each triangle with its own corners, and the copies of one
corner are not always identical. `tolerance_m` (`toleranceM`, default 0:
identical positions only) is the largest distance between two copies of
one corner. Keep it well below the smallest real edge. No vertex moves
and the shape stays the same; the mesh gets smaller.
2. **Simplify**: `simplify_meshes` (`simplifyMeshes`) removes detail.
`max_error_m` (`maxErrorM`, default 1 m) is the error limit;
`target_ratio` (`targetRatio`) limits the kept share of the triangles.
The first limit met stops it. The copy keeps a subset of your vertices
with their exact values.
- The error is **typical, not a bound**. Most of the surface stays within
`max_error_m`, but single points can be 2 to 3 times as far. A thin
part (a mast, an antenna) becomes a line.
- `lock_border` (`lockBorder`, default on) keeps the rim of a terrain
sheet, so it still meets its neighbour. Turn it off for buildings with
an open base: they then simplify further.
- A mesh that collapses to no triangle (a thin wall with `lock_border`
off) is left out of the result. Compare the number of meshes in and
out to see how many.
3. **Export** (to look at it or keep it): `export_meshes` (`exportMeshes`)
writes `"dotbim"` (default: the open mesh format of the Grasshopper,
Blender and Speckle plugins, in metres, Z up, site frame), `"obj"` (Rhino
opens it without a plugin) or `"json"` (the SDK dict: load it and pass it
back later). The SDK reads back only `"json"`.
4. **Pass it straight in**: the `geometry` of a result goes into the
payload as it is. No file is needed in between.
For example, a 1,000,000-triangle terrain becomes 10,000 triangles in less
than a second, and 640,000 triangles of detailed city buildings become
112,000 at 1 m with `lock_border=False`.
=== "Python"
```python
from infrared_sdk.geometry import export_meshes, simplify_meshes, weld_meshes
terrain = simplify_meshes(weld_meshes(dem_mesh, tolerance_m=0.001).geometry,
max_error_m=0.5)
far = simplify_meshes(weld_meshes(far_buildings, tolerance_m=0.001).geometry,
lock_border=False)
print(far.report) # triangles in and out per mesh
with open("far-context.bim", "w") as f:
f.write(export_meshes(far.geometry)) # look at it (dotbim)
payload = SvfModelRequest(analysis_type=AnalysesName.sky_view_factors,
analysis_surfaces="all",
ground_geometry=terrain.geometry,
context_geometry=far.geometry)
```
=== "TypeScript"
```ts
import { exportMeshes, simplifyMeshes, weldMeshes } from "@infrared-city/infrared-sdk-ts";
const terrain = simplifyMeshes(weldMeshes(demMesh, { toleranceM: 0.001 }).geometry,
{ maxErrorM: 0.5 });
const far = simplifyMeshes(weldMeshes(farBuildings, { toleranceM: 0.001 }).geometry,
{ lockBorder: false });
console.log(far.report); // triangles in and out per mesh
await writeFile("far-context.bim", exportMeshes(far.geometry)); // look at it (dotbim)
const payload = { analysisType: "sky-view-factors", analysisSurfaces: "all",
groundGeometry: terrain.geometry, contextGeometry: far.geometry };
```
### Bring your own sensors
The ground grid is the default. You can choose where the values are:
- **Facades and roofs**: `analysis_surfaces` (`analysisSurfaces`) is
`"facades"`, `"roofs"` or `"all"`. `surface_grid_size` (`surfaceGridSize`)
sets the cell size in metres (default 2.0, minimum 0.25). `surface_offset`
(`surfaceOffset`) sets the distance from the surface (default 0.1 m). This
is an area run. See [Facades and roofs](#facade-and-roof-runs).
- **Your own points**: `sensor_points` (`sensorPoints`) is a list of
`[x, y, z]` points in metres, in the frame of your geometry. The list
must not be empty and has at most 300,000 points for each job.
`sensor_normals` (`sensorNormals`) is optional: one non-zero normal
`[x, y, z]` for each point, in the same order. You cannot use
`analysis_surfaces` and `sensor_points` in one request.
Both work on the four sun and light analyses: solar radiation, sky view
factor, direct sun hours and daylight availability. Thermal comfort and
wind take no own sensors. The interior daylight factor takes
`sensor_points` and `sensor_surfaces` too. See
[Interior](#interior-beta).
Own points are not an area run: `run_area` and `run_area_and_wait`
(`runArea`, `runAreaAndWait`) refuse them. The SDK does not tile them. Send
your geometry with them in one request, and call
`client.analyses.run_and_wait(request)` (TypeScript:
`client.runAndWait(request)`). The result is a flat list with one value for
each point, under the key `output`.
=== "Python"
```python
request = SvfModelRequest(
analysis_type=AnalysesName.sky_view_factors,
geometries=my_tower, # your meshes, in metres
sensor_points=[[110, 90, 1.5], [110, 130, 15]],
sensor_normals=[[0, -1, 0], [0, 1, 0]],
)
result = client.analyses.run_and_wait(request)
values = result["output"] # one entry for each point
```
=== "TypeScript"
```ts
const result = await client.runAndWait({
analysisType: "sky-view-factors",
geometries: { tower: { coordinates, indices } },
sensorPoints: [[110, 90, 1.5], [110, 130, 15]],
sensorNormals: [[0, -1, 0], [0, 1, 0]],
});
```
### Weather and time period
Thermal comfort, solar radiation and energy balance read weather.

#### Two sources
1. **Your own EPW file.** Use any hourly `.epw` file with one year of data
(8760 rows). The SDK refuses sub-hourly files. It reads and checks the
file on your machine. **Nothing is uploaded as a file.**
2. **The public catalog.** It has 16,757 stations. Find the nearest one by
location. A station holds one typical year (TMYx): each month is one
real month from many years of records (2009 to 2023 for most stations).
The catalog has no forecast, no future climate and no single year that
you choose. For those, use your own EPW file.
#### Time period
A time period is a date span with a daily hour range: start and end month,
day and hour. 1 Jun to 31 Aug, 08 to 18 h, keeps 1,012 hours.
A winter window works too. 1 Dec to 28 Feb is **one window** of December,
January and February (990 hours at 08 to 18 h). The values are in file
order: January first.
One hour is a valid window: start hour = end hour. The SDK checks the window
before any request, with the same rule on every SDK, and refuses:
- a month that is not 1 to 12, an hour that is not 0 to 23, or a day that is
not in its month (29 Feb is accepted, because a window has no year);
- a window in one month that ends before it starts (20 Jun to 10 Jun);
- for solar radiation, direct sun hours, daylight availability and the two
thermal comfort analyses, an hour range across midnight (22 to 6 h). The
server refuses it for these analyses. A weather selection with no analysis
accepts it: 22 to 6 h keeps 22, 23 and 0 to 6 h of each day.

#### Which column goes where
The SDK sends only the arrays that the analysis reads.
- **Thermal comfort** (UTCI and statistics): 7 columns. They are air
temperature, humidity, wind speed, global, direct and diffuse radiation,
and infrared from the sky.
- **Solar radiation**: direct and diffuse radiation.
- **Energy balance** (interior, Beta): air temperature and global radiation.
- **Direct sun hours, daylight availability**: no weather array. They need a
time period and a location. Sky view factor and daylight factor need no
weather input.
- **Wind analyses**: the wind comes from the weather file too, but you put
it into the request yourself. Pedestrian wind comfort takes the hourly wind
speeds and directions of your time window from the file. Wind speed takes
one speed and one direction: pick them from the file or set them.
The SDK reads the other columns of the file but does not send them, for
example dew point, pressure, sky cover, illuminance, rain and snow.
A gap in the file inside your window is an error before you pay. The SDK
never fills a gap.
=== "Python"
```python
from infrared_sdk import parse_epw
stations = client.weather.get_weather_file_from_location(lat=48.21, lon=16.37)
rows = client.weather.filter_weather_data(
identifier=stations[0]["uuid"], time_period=winter, # winter: a TimePeriod, 1 Dec to 28 Feb
)
# or your own EPW file, read on your machine
weather = parse_epw("vienna.epw")
```
=== "TypeScript"
```ts
const stations = await client.weather.getWeatherFileFromLocation(48.21, 16.37, 100);
const hours = await client.weather.filterWeatherData(stations[0].uuid, {
period: { start: { month: 12, day: 1, hour: 8 },
end: { month: 2, day: 28, hour: 18 } },
});
// or your own EPW file (pass the text)
const weather = client.weather.parseEpw(await file.text());
```
Put the weather into the analysis request. See the example in
[How a run works](#how-a-run-works).
### No data yet? Public context
The SDK can read public data for your area:
| Layer | Public source |
|---|---|
| Buildings (`buildings.get_area`, `getBuildingsInArea`) | City overlay of Infrared where it exists, else Overture footprints |
| Ground materials (`ground_materials.get_area`, `groundMaterials.getArea`) | Roads from Infrared, with Overture water, land cover and land use |
| Trees (`vegetation.get_area`, `vegetation.getArea`) | Public Infrared tree data (no extra needed) |
Buildings and ground materials need the `geodata` extra: Python
`pip install "infrared-sdk[geodata]"`, TypeScript
`npm install hyparquet hyparquet-compressors`. There is no public terrain.
A data host that answers HTTP 200 to a Range request gives the error
" answered 200 to a Range request (host cache configuration); report it
at https://github.com/Infrared-city/infrared-core/issues". The cause is the
cache of that host. The host is the host name only, with no user and no port.
Pass the buildings object itself to the run, not only its inner map. The
object keeps its origin. See [Coordinates](#coordinates).
#### Learn more
- [Coordinates](#coordinates): the frame of your model.
- [How a run works](#how-a-run-works): the steps of one run.
- Python: [the client](python/sdk.md). TypeScript:
[the SDK reference](api/typescript/index.md).
## The ten analyses
SDK 1.0 has ten analyses. Eight are outdoor analyses. They run on an area,
and the SDK cuts the area into tiles. Two are interior analyses. They are
**Beta**. You can run several outdoor analyses in one call.

### Outdoor wind
- **Wind speed**: the wind speed at each point, for one speed and one
direction. Pick them from the weather file or set them. It takes no
terrain.
- **Pedestrian wind comfort**: a comfort class for a criterion that you
select. You give the hourly wind speeds and directions from the weather
file. It takes no terrain.
### Outdoor sun and light
- **Solar radiation**: the solar radiation over a time period.
- **Sky view factor**: how much open sky each point sees. It needs no
weather and no time period.
- **Direct sun hours**: the hours of direct sun over a time period.
- **Daylight availability**: the share of daylight over a time period.
Only these four give values on facades and roofs. They also take your own
sensor points (`sensor_points`, up to 300,000 for each job) and give one value
for each point. See [Bring your own sensors](#bring-your-own-sensors).
### Outdoor thermal comfort
- **Thermal comfort index (UTCI)**: the perceived outdoor temperature over a
time period.
- **Thermal comfort statistics**: the percent of time in comfort, heat
stress or cold stress.
### Daylight factor and energy balance (Beta)
- **Daylight factor: rooms**: the daylight factor at sensor points in rooms,
under a CIE overcast sky. A large floor runs in parts.
- **Daylight factor: your sensors**: the same overcast-sky method on
sensors that you give: your own points (`sensor_points`), or your own
horizontal surfaces, for example a roof (`sensor_surfaces`). It is not an
area run.
Daylight availability (above) and the daylight factor are two different
methods. Daylight availability uses the sun and the sky over a time window.
The daylight factor uses a standard overcast sky and needs no time.
- **Energy balance**: the monthly heating and cooling energy need of each
zone. Run one building in one request.
Interior analyses do not run as an area run.
### All analyses at a glance
| Analysis | Tells you | Values on | Needs | Tiling family | Unit |
|---|---|---|---|---|---|
| Wind speed (`wind-speed`) | Wind speed for one speed and direction | Ground | One wind speed and direction (from the file or set). No terrain. | Wind | m/s |
| Pedestrian wind comfort (`pedestrian-wind-comfort`) | Comfort class for a criterion | Ground | A criterion and the hourly wind speeds and directions from the weather file. No terrain. | Wind | Comfort class |
| Solar radiation (`solar-radiation`) | Radiation over a time period | Ground, facade, roof | Time period, diffuse horizontal and direct normal radiation | Solar | kWh/m² |
| Sky view factor (`sky-view-factors`) | Open sky at each point | Ground, facade, roof | No weather, no time period | Solar | % (0-100) |
| Direct sun hours (`direct-sun-hours`) | Hours of direct sun | Ground, facade, roof | Time period and location | Solar | h |
| Daylight availability (`daylight-availability`) | Daylight over a time period | Ground, facade, roof | Time period and location | Solar | % |
| Thermal comfort index (`thermal-comfort-index`) | UTCI over a time period | Ground | Time period and 7 weather columns | Solar | °C |
| Thermal comfort statistics (`thermal-comfort-statistics`) | Percent of time in comfort, heat or cold stress | Ground | Time period and the same 7 weather columns | Solar | % of time |
| Daylight factor: rooms (`daylight-factor`) | Daylight factor at sensor points (Beta) | Room | Walls, slabs, windows and sensors. No weather. | None (floor parts) | % |
| Daylight factor: your sensors (`daylight-factor`) | Daylight factor at points or on horizontal surfaces you give (Beta) | Your points, roof | Your points (`sensor_points`) or surfaces (`sensor_surfaces`), context geometry. No weather. | None | % |
| Energy balance (`energy-balance`) | Monthly heating and cooling need (Beta) | Room | 2 weather series (default model). One building in one request. | None (one request) | kWh/m²·yr |
The tiling family sets the tile step and the context around each tile. See
[Tiling and context](#tiling).
#### Learn more
- [Your model](#your-inputs): the inputs each analysis reads.
- [Weather and time period](#weather-and-time-period): the weather columns.
- [Results](#what-comes-back): read real values, for example UTCI.
- [Interior analyses](#interior-beta): daylight factor and energy balance.
- [Facades and roofs](#facade-and-roof-runs): runs with values on surfaces.
- API reference: [Python](python/index.md) and [TypeScript](api/typescript/index.md).
## Interior (Beta)
Two interior models run on one building and not on an area: **daylight
factor** and **energy balance**. Both are in Beta. You send the walls, slabs
and windows. `run_area` refuses them.

### Daylight factor: the inputs
The model gives the daylight factor in % under a CIE overcast sky. It has no
date and no time.
1. `barriers`: the walls and slabs (category `"wall"` or `"floor"`).
2. `openings`: the windows (category `"window"`). A window can carry its own
light transmittance from 0 to 1 (`opening_factor=` in
`interior_entities`). Without it, `glazing_transmittance` applies
(default 0.63).
3. `spatial_volumes` (optional): one closed volume for each room (category
`"space"`), for results for each room.
4. `floors`: the storeys to calculate, by index or by UUID.
5. The sensors: a grid on each floor (`grid_size`, default 0.5 m;
`analysis_height`, default 0.8 m), or your own sensors (see
"Your own sensors" below).
6. `context_geometry`: neighbours that only give shade. Without them the rooms
read too bright. `ground_geometry` holds the terrain.
7. `room_reflectances`: floor 0.2, walls 0.5, ceiling 0.7 by default.
The result is one value for each sensor point. With rooms, you also get the
mean, minimum, maximum and the share of area at 2 % or more for each room.
### Your own sensors
Bring your own sensors instead of the floor grid. This also works outside a
room: the same overcast-sky method, for example on a roof.
- `sensor_points` (`sensorPoints` in TypeScript): a list of `[x, y, z]`
points in metres. The result has one value for each point.
- `sensor_surfaces` (`sensorSurfaces`): your own meshes by id. The model puts
a sensor grid on them. The server refuses a surface that is not
horizontal, so a facade does not work here. For facades, use an outdoor
analysis with `analysis_surfaces`.
- If you send both, `sensor_points` wins and `sensor_surfaces` is ignored.
The SDK refuses this. With either one, `floors` is ignored: the SDK
refuses `floors`, `floor_index` and `floor_uuid` next to them.
- A request with your own sensors is one job. The SDK does not split it into
parts.
- Add `context_geometry` for the neighbours that give shade. Barriers are
optional when you bring `context_geometry`, `ground_geometry` or trees.
### Parts of a large building
The SDK counts the sensors of each floor and packs whole floors into parts of
about 300,000 points. A floor that is bigger than one part is split inside the
floor. Each part is one job, and each job is billed. The SDK joins the parts
exactly.
All parts must finish. If one part fails, you get a `PartsRunError` and no
result. Call again with `retry_from=exc.schedule`: the SDK sends only the
failed parts. A part that is sent again is a new job, so it is billed.
When the server supports it, the SDK uploads the scene one time and all parts
use it. Else each part sends its own JSON.
To see the part count and the cost first, use
`client.analyses.preview_parts(request)`. Energy balance has no parts: it
sends one request for each building.

### Energy balance: the inputs
The model calculates the heating and cooling energy **need** of each zone
(monthly method).
1. `spatial_volumes`: one closed volume for each zone (category `"space"`).
This field is required.
2. `barriers`: the walls (`"wall"`) and every slab, the roof too (`"floor"`).
3. `openings`: the windows.
4. `context_geometry` and `ground_geometry`: neighbours and terrain. They give
shade only with `solar_model="irradiance"`.
5. Weather: one year of hourly data from an EPW file, through
`from_weather(parse_epw(...))`. For a leap year (8784 hours), set `year`.
6. `solar_model`: `"legacy-flat"` is the default. It uses two series
(`dry_bulb_temperature`, `global_horizontal_radiation`) and ignores shade.
`"irradiance"` is opt-in. It uses the shade geometry and needs latitude,
longitude and four hourly series.
7. `energy_settings=EnergySettings(...)`: the U-values, glazing, set-points,
gains, infiltration and thermal mass. Every field is optional, and an
unset field uses the server default. The defaults include `u_values`
(`ext_wall` 0.13, `flat_roof` 0.25, `ground_floor` 0.30 W/m²K),
`glazing` (`u_value` 1.1, `shgc` 0.60, `frame_fraction` 0.15),
`occupancy` (`heating_setpoint` 21 °C, `cooling_setpoint` 26 °C,
`people_gains` 1.6 W/m²), `ach_infiltration` 0.03 and
`construction_class="medium"`. See
[Material and building properties](#material-and-building-properties)
for all names, units and defaults.
8. `operation`: when the plant runs. The default is continuous (24 hours,
7 days). For an office, use
`Operation.intermittent(hours=(8, 18), days="weekdays")`.
The ground reflectance for ground-reflected sun is `ground_reflectance`
(default 0.2). You cannot set a reflectance for each wall or window: the
properties apply to the whole request. For several buildings in one request,
each entry of `buildings` can override the request.
**Keep one building whole in one request.** A slab with heated rooms on both
sides is internal. If you send one storey alone, it loses heat through its
slabs. The result is the need in kWh/m²·yr (`EUI_heat`, `EUI_cool`) and 12
monthly values. It is not delivered energy: no boiler, heat pump or chiller
efficiency is applied.
### Example: interior run
=== "Python"
```python
from infrared_sdk import PartsRunError, interior_entities, parse_epw
from infrared_sdk.analyses.types import (
AnalysesName, DaylightFactorModelRequest, EnergyBalanceModelRequest,
)
# my_barriers: interior_entities(...) of category "wall" and "floor"
windows = interior_entities(my_windows, category="window")
df = DaylightFactorModelRequest(
analysis_type=AnalysesName.daylight_factor,
barriers=my_barriers, openings=windows, floors=[0, 1],
context_geometry=interior_entities(my_neighbours),
)
try:
result = client.analyses.run_and_wait(df)
except PartsRunError as exc: # retry sends only the failed parts
result = client.analyses.run_and_wait(df, retry_from=exc.schedule)
eb = EnergyBalanceModelRequest.from_weather(
parse_epw("vienna.epw"), year=2021,
spatial_volumes=interior_entities(my_zones, category="space"),
barriers=my_barriers, openings=windows,
)
energy = client.analyses.run_and_wait(eb) # one job: the result dict
```
=== "TypeScript"
The TypeScript SDK has no typed request classes for these two models. Send
a plain object with the wire keys to `client.runAndWait(request)`. A
daylight factor run gives a `DaylightFactorResult`, and
`client.previewParts` shows the parts. The TypeScript SDK has no typed
energy balance request, so use Python for the `"irradiance"` solar model.
```ts
const request = { "analysis-type": "daylight-factor",
barriers: myBarriers, openings: myWindows, floors: [0, 1] };
const result = await client.runAndWait(request) as DaylightFactorResult;
```
#### Learn more
- [What comes back](#what-comes-back): the shape of an interior result.
- Python: [the client](python/sdk.md).
- TypeScript: [the SDK reference](api/typescript/index.md).
## What comes back
An area run gives one merged result. A facade or roof run gives one value for
each surface cell. An interior run gives one value for each sensor point. In
all cases, read the values with the helper of the SDK. The helper gives you the
real values, whatever type the server used to send them.

### Three shapes
1. **Ground grid (area runs).** The SDK merges the tiles and clips the result
to your area. You get one map with cells of 1 m. A cell outside the area
has no value.
2. **Facades and roofs (surface runs).** You get one value for each cell of
each surface, in columns.
3. **Interior points (daylight factor).** You get one value for each sensor
point. Each point has a room, or no room. See [Interior](#interior-beta).
| | Python | TypeScript |
|---|---|---|
| Ground grid | `result.merged_grid`, `result.physical_grid()` | `result.mergedGrid`, `areaGridValuesF32(result)` |
| Surface cells | `result.columns.values`, `columns.physical_values()` | `columns.values`, `surfaceValuesF32(columns)` |
| Interior points | `result.columns.values`, `result.columns.room` | `result.values`, `result.room` |

### Wire type and real values
The server stores each result in the smallest type that is accurate enough.
The raw array keeps this wire type:
- **f16** (half float): solar radiation, sky view factor, thermal comfort
statistics, wind speed, and UTCI.
- **f32**: direct sun hours, daylight availability, and the class codes of
pedestrian wind comfort.
Do not read the raw array. Use the helper. It handles every type, and it
gives NaN to a cell with no value.
In TypeScript, an f16 grid is a `Uint16Array` of half-float **bits**, not of
numbers. `areaGridValuesF32` and `surfaceValuesF32` give you a `Float32Array`
of real values.
### The legend range
The result holds the range of its own values: `min_legend` and `max_legend`
(`minLegend` and `maxLegend` in TypeScript). The SDK measures them from the
finished result. Use them for your colour scale. Class codes have no legend
range.
A class result (pedestrian wind comfort) holds class codes. A code is an
index into `result.legend`, which holds only the classes of this run, in
order. The same code can be a different class in another run. Map each code
through `result.legend` before you count or compare classes.
### Example: read a result
=== "Python"
```python
result = client.run_area_and_wait(payload, polygon, buildings=buildings)
values = result.physical_grid() # float64, NaN = no value
print(result.min_legend, result.max_legend)
# a facade or roof run
cells = result.columns.physical_values()
```
=== "TypeScript"
```ts
import { areaGridValuesF32, surfaceValuesF32 } from "@infrared-city/infrared-sdk";
const result = await client.runAreaAndWait(payload, polygon, { buildings });
const values = areaGridValuesF32(result); // Float32Array, NaN = no value
console.log(result.minLegend, result.maxLegend);
// a facade or roof run gives SurfaceColumns (see "Facade and roof runs")
const cells = surfaceValuesF32(surfaceResult);
```
#### Learn more
- [Facade and roof runs](#facade-and-roof-runs): batches and render buffers.
- [Interior](#interior-beta): daylight factor and energy balance.
- Python: [the client](python/sdk.md).
- TypeScript: [the SDK reference](api/typescript/index.md).
## Facade and roof runs
A facade or roof run puts sensors on the walls and roofs of your buildings. It
gives one value for each sensor cell. Only solar radiation, sky view factor,
direct sun hours and daylight availability run on surfaces. Set
`analysis_surfaces` (`analysisSurfaces`) to `"facades"`, `"roofs"` or `"all"`.
The sensors replace the ground grid.
**Only the buildings inside your area polygon get sensors.** A building is a
target when the centre of its bounding box is inside the polygon. Each building
therefore belongs to one area, and two areas that touch never count it twice.
A building that you pass in but that is outside the polygon is not removed: it
stays in the scene as shade, and it gets no sensors and no result surfaces. A
20 m polygon around one building gives the surfaces of that building only, even
if you pass in the whole district. Ground analyses do not change.
### Batches
1. **Sensors.** The SDK puts a grid of sensor cells on the walls and roofs of
the target buildings of each tile (the buildings inside the polygon).
2. **Batches.** The SDK puts the buildings into batches by sensor count. With
`packing="regular"` (the default) a batch has at most 250,000 sensors, and
the SDK counts the sensors of each batch exactly and groups the buildings
by building id. With `packing="fast"` it counts each building one time,
alone, and fills each batch up to 290,000 sensors by those counts, in the
order of the building ids. Fast
plans in less time and usually makes fewer, fuller jobs. The result is the
same: the cells of a building, their keys and their values do not depend
on the batch of the building, only on the building and the terrain.
3. **One job for each batch.** Each job is billed. A tile with no target
building sends no job and costs nothing.
4. **The scene.** When the server supports it, the SDK uploads the scene of a
tile one time. The jobs of the tile use that upload. With the default
packing, the scene is the same file as the tile of a ground analysis: a run
with ground and facade analyses uploads each tile one time. This is true for
both packings.
5. **Shade.** Neighbour buildings (outside the polygon) and the buildings of
other batches only give shade. They get no result. A building has the cells of its own
geometry only: a cell that a neighbour hides, even a cell inside the
neighbour, keeps its sensor and is simply dark. Only a cell inside the
building itself, or below the ground, has none.
6. **Merge.** The SDK joins the batches into one result.
To see the number of jobs before you run, use `preview_area(..., payload=...)`
and read `would_bill_jobs`. Without `payload=`, the facade count is too low.
The plan depends only on the geometry and the surface settings (grid size,
offset, mesh cleaning, terrain alignment, `max_sensors_per_job`, `packing`),
not on the analysis or the weather. The SDK makes it one time and keeps it in
the client: the analyses of one call share it, and a later run or preview on
the same geometry uses it again. The facade analyses of one call
(`run_area_and_wait([...])`, `runAreaStream([...])`) also share each job's
geometry: the SDK writes it one time for all of them.
### Draw the result: render buffers
To draw the cells, you do not need one mesh for each cell. The **render
buffers** are a few flat arrays that any renderer can read: deck.gl, three.js
or raw WebGL. See [Render buffers in detail](#draw-facade-and-roof-results-fast).
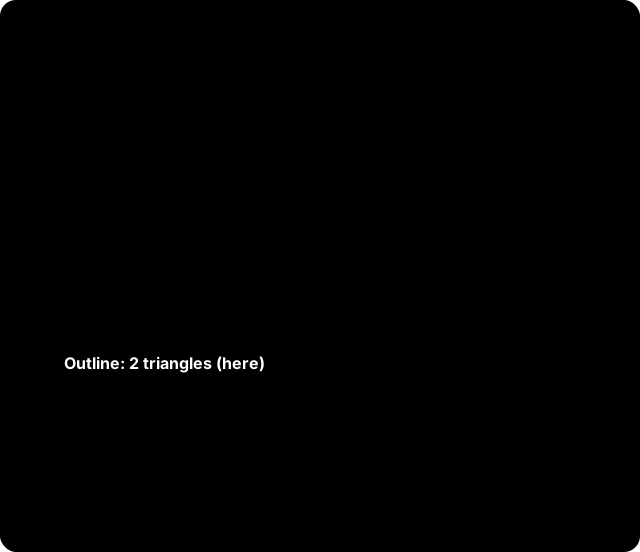
A **frame** is one flat region (a wall or a roof part) with a regular grid of
cells. The buffers hold:
- `outline`: the triangles of each frame, in cell units. They follow the exact
border of the surface.
- `frames` and `dims`: the corner and steps of each frame, and its columns,
rows and first cell (`cellStart`).
- `values`: one value for each cell, `f16` or `f32`.
- `validity`: one bit for each cell. A cell with no value has value `0` and a
clear bit. Values are never NaN. Test the bit, not the value.
- `anchor`: the centre of the run, in 64-bit floats. Keep it in the model
transform of your scene.
- `valueMin`, `valueMax`, `anyValid`: the range for your colour scale.
The shader finds cell `k = cellStart + i * nu + j` from the outline point
`(s, t)`: `j = floor(s)`, `i = floor(t)`. It reads `values[k]` and bit `k & 7`
of byte `k >> 3` of `validity`. Draw frames with both faces. Keep one run to
one site, so the corners stay accurate.
### One job: per-cell triangles
`run_and_wait` (`runAndWait`) runs a small facade or roof request as one job.
With `emit_cell_tris=True` (`emitCellTris: true`), each surface of the result
gets the triangles of each cell as `x, y, z` values (9 for each triangle):
Python puts them in `cell-tris` (one list for each cell, or `None`), TypeScript
in `cellTris` with `cellTrisOffsets` (the range of each cell). The request does not ask
the server for them. The SDK draws them from the geometry it sent, in the same
way as for an area run, so both SDKs give the same values. When the drawn
cells do not agree with the result, the SDK attaches no triangles and writes
the reasons to `cell-tris-fallback`. A job that you submit and download
yourself has no triangles.
### Save, reload and free
The **layout** (frames and outline) depends only on the geometry. Every result
holds its `layout_key` (`layoutKey`): the analyses of one call, and later runs
on the same geometry and surface settings, have the same key. Build your mesh,
UVs and GPU buffers one time for each key, and change only the values. Save
the layout one time for each geometry. The **values** of each run are one blob with no
outline. It holds the `layout_key` of its layout. A live result needs no
layout: merge the run in the client that submitted it. Save the layout only to
draw later, or in another process. `attach_values` (`attachValues`) refuses a
layout that does not match the values. The Python SDK and the TypeScript SDK
can load the files that the other SDK saves.
To drop a schedule that you will not merge, call
`client.forget_schedule(schedule)` (`client.jobs.captures.forgetSchedule`).
Memory rules are in [Render buffers in detail](#draw-facade-and-roof-results-fast).
### Example: facade run
=== "Python"
```python
from infrared_sdk.analyses.types import SvfModelRequest
from infrared_sdk.analyses.surface_columns import SurfaceColumns
from infrared_sdk.facade_layout import FacadeLayout, attach_values
payload = SvfModelRequest(analysis_type="sky-view-factors",
analysis_surfaces="facades", surface_grid_size=3.0)
result = client.run_area_and_wait(payload, polygon, buildings=my_buildings)
buffers = result.columns.render_buffers() # a live result
# later, from saved bytes
layout = FacadeLayout.from_bytes(saved_layout)
columns = SurfaceColumns.from_bytes(saved_values)
attach_values(layout, columns, expected_layout_key=columns.layout_key)
buffers = columns.render_buffers(layout=layout)
```
=== "TypeScript"
```ts
import { FacadeLayout, attachValues, surfaceRenderBuffers, type SurfaceColumns }
from "@infrared-city/infrared-sdk";
const payload = { analysisType: "sky-view-factors",
analysisSurfaces: "facades", surfaceGridSize: 3 };
const columns = (await client.runAreaAndWait(payload, polygon,
{ buildings: myBuildings })) as SurfaceColumns;
const buffers = surfaceRenderBuffers(columns); // a live result
// later, from saved bytes
const layout = FacadeLayout.fromBytes(savedLayout);
attachValues(layout, columns, { expectedLayoutKey: savedLayoutKey });
const saved = surfaceRenderBuffers(columns, { layout });
layout.free();
```
#### Learn more
- [What comes back](#what-comes-back): wire types and the helpers.
- [Serve many users](#serve-many-users): a server that draws for many users.
- Python: [the client](python/sdk.md).
- TypeScript: [the SDK reference](api/typescript/index.md).
## Where it runs
The SDK runs on your machine. Only the simulation models run in the Infrared
cloud. This page shows where the SDK can run.

### One core
The SDK has one core, written one time in Rust. Python and TypeScript use the
same compiled core for the hard steps: tiling, geometry preparation, packing
and merge. The same core also runs the engine that decides every send, status
check, download and retry. You get the same result and the same retry rules
in Python and in the browser.
Your machine sets the speed of these steps. The network and the cloud models
set the rest. Measured on 2026-10-07 (1.0.0 packages, production API): one
square kilometre of Vienna (4,212 buildings, own data) with sky view factor,
wind and UTCI in one Python call took 8.7 s.
### Python
- The engine sets the number of requests at the same time: 32 submits (or
5 batch submits), 16 status requests, 13 downloads. Python decodes and merges at most 8 tiles at
the same time: that is CPU work, and more threads only use more memory. You
set no thread count for the run.
`max_workers` has no effect and is deprecated.
- The merge runs in the background while the jobs run.
### Node.js
- Use Node 18 or later. The engine sets the requests at the same
time, the same as in Python. `maxWorkers` has no effect and is deprecated.
A network call does not block the JavaScript thread.
- Call `await initializeCore()` one time before a run call (`runArea` or
`runAreaAndWait`). Without it, a run call throws `CoreNotReadyError`. Only
the public site reads (`buildings.getBuildingsInArea`, `vegetation.getArea`,
`groundMaterials.getArea`) load the core by themselves.
- On Node 22 or later, the core uses threads by default: `min(4, cores)` (8 from 16 cores)
worker threads (the Rust rayon pool). On Node 18 and 20, and on a machine
with one core, it uses one thread. The results are the same bytes either way.
- To use one thread, or another count, say so before any other SDK call:
```ts
await initializeCore({ threads: 1 }); // one thread
await initializeCore({ threads: 8 }); // eight threads
```
The threads decode and merge the result tiles, zip the request bodies,
prepare the site, and build the facade captures, layouts and joins. This work
does not block the JavaScript thread: the SDK waits for the pool with
`Atomics.waitAsync`, so sends, polls, downloads and your own timers go on. With
one thread, the core runs each call at once, as before. All the downloads of one moment go to the core in one
call. 13 analyses, 625 jobs in one stream (fake gateway, build-box,
2026-10-09): 12 s with 4 or 8 threads, 18-20 s on one thread. Threads do not
speed up network calls. A core error on a thread is a thrown error, and the
process continues. Only running out of WebAssembly memory (near 4 GiB) ends
the process.
**Module format.** The package is ESM. CommonJS `require()` works for the
root entry only. The types are in the package: use TypeScript 5.4 or later
(5.8 for CommonJS).
### TypeScript in the browser
The browser runs the core on one thread and needs no special headers. Use a
Web Worker to keep the page free.
1. In the worker file, call `serveSdkWorker()`.
2. On the page, call `createWorkerClient`. Compile the WASM module one time
and give it to the worker. Call `initializeCore` on the page and in each
worker: each has its own core.
3. Put your API key in a proxy on your own origin. The browser never
holds it.
4. Optional: pass a `geometryUrlStore` that you own. A new worker then does
not upload the tiles again. A repeat run of the same area then uploads
nothing.
```ts
// sdk.worker.ts
import { serveSdkWorker } from "@infrared-city/infrared-sdk/worker";
serveSdkWorker();
// page
import { createWorkerClient } from "@infrared-city/infrared-sdk/worker";
const sdk = createWorkerClient({
worker: new Worker(new URL("./sdk.worker.ts", import.meta.url), { type: "module" }),
module, // the compiled WASM module
config: { baseUrl: `${location.origin}/infrared-api` }, // your proxy
getToken: () => session.accessToken(), // your session, not the API key
});
```
For the proxy and the save and reload steps, read
[Serve many users](#serve-many-users).
### A good worker pattern

**Who does what.** The worker prepares the site, uploads the geometry and
submits the jobs (`runArea`). It then downloads, decodes and merges the
results (`mergeAreaJobs`) and transfers the buffers to the page. When you use
`runArea` and `mergeAreaJobs` in a worker, poll the job status with a plain
`InfraredClient` on the page (same `config` and `getToken`). The worker client
has no `runAreaAndWait`. The page builds the render buffers.
To get each analysis as soon as it is ready, call `runAreaStream` on the
worker client. The worker polls, downloads and merges by itself, and the
page needs no polling client. The buffers of each result are transferred.
```ts
for await (const item of sdk.runAreaStream([solar, wind], polygon, { buildings })) {
if (item.error === undefined) draw(item.index, item.result);
}
```
**Do**
- Use one SDK worker for each signed-in session.
- Keep the heavy work in the worker and the API key in your proxy.
- Transfer the result buffers to the page. Do not clone big arrays.
- Use a `geometryUrlStore` to skip the upload after a reload. See
[Reuse uploads across reloads and workers](#reuse-uploads-across-reloads-and-workers).
- Use one client for each process.
- Free what you keep: `forget_schedule` (`forgetSchedule`) and `close()`.
**Do not**
- Do not start one worker for each tile, or share one worker between two
clients (a second `createWorkerClient` on the same worker throws).
- Do not send a run again after a worker failure. A paid job can exist.
- Do not use `threads` above 1 in the browser. It refuses them (threads in a
page need COOP/COEP headers, which the SDK does not require).
- In Node, `createWorkerClient({ worker, config, threads: 4 })` takes a
`node:worker_threads` `Worker` and runs it on the threaded core. The worker
file imports `@infrared-city/infrared-sdk/worker` and calls
`serveSdkWorker()`: it listens on `parentPort`. You need no adapter.
- Do not run many large merges in one process. A 4 km facade merge peaks at
about 3 GB.
**The sweet spot.** One SDK worker, the default settings of the engine, and
the default threads in Node 22 or later. More workers use more
memory: each has its own core and its own copy of the geometry.
### Which TypeScript mode fits your setup
| Your setup | Use |
|---|---|
| Node on a server, many tiles | The threaded core (the default: 4 threads, 8 from 16 cores) |
| Node with little memory | `initializeCore({ threads: 1 })`: about 90 MB less, almost the same speed |
| You want the first results early | `runAreaStream` |
| Browser app, the page must stay smooth | `createWorkerClient`: the work runs off the main thread and uses less memory |
Set the thread count with `initializeCore({ threads })` before any other SDK
call. Measured (production API, Vienna 1 km², 28 jobs, 6 cores):
threaded 3.5 s / 500 MB, one thread 3.6 s / 408 MB, `runAreaStream` 3.3 s /
511 MB, worker client 3.8 s / 461 MB.
#### Learn more
- [How a run works](#how-a-run-works) and [Serve many users](#serve-many-users)
- [TypeScript reference](api/typescript/index.md), [Python client](python/sdk.md)
## Serve many users
Use this guide when many people use your app to run facade or roof analyses
and look at the results. You choose where the SDK runs. Both ways use the same
SDK calls and saved formats. For the runtimes, read [Where it runs](#where-it-runs).

### Two ways
| | A. In the browser (default) | B. On your server |
|---|---|---|
| Who pays for the compute | Each user's device | Your server |
| Your server does | Hides the API key (a proxy), optional quotas | Holds the key, runs, merges and stores |
| Best for | Interactive apps | Batch jobs, no browser, shared results |
You can mix the two. A result that a server made can be drawn in a browser,
and the other way round.
**Never send the API key to a browser.** In both ways the key stays on your
server.
### A. In the browser
The SDK runs in one Web Worker on the user's device. Use one client for each
tab. It keeps the geometry once for all analyses of that user. For the worker
code, read [Where it runs](#where-it-runs).
The browser must call the API through a proxy on your own origin. The proxy:
1. Checks that the user is signed in (your own check).
2. Optionally counts the runs of the user against a quota.
3. Replaces the `Authorization` header with your key (`X-Api-Key`).
4. Forwards the request to `https://api.infrared.city/v2`.
5. Also relays the storage URLs for upload and download, because the
browser blocks them. The code below does not show this. See "Calling the
API from a browser page" in the TypeScript README.
```js
// A small proxy. Any server or edge function that can forward a request works.
// Add the relay for the storage URLs (step 5) yourself.
export default {
async fetch(request, env) {
const url = new URL(request.url);
if (!url.pathname.startsWith("/infrared-api/")) return new Response("Not found", { status: 404 });
const user = await verifySession(request.headers.get("Authorization"), env); // your check
if (!user) return new Response("Forbidden", { status: 403 });
const headers = new Headers(request.headers);
headers.delete("Authorization");
headers.set("X-Api-Key", env.INFRARED_API_KEY); // a secret on the server only
const target = "https://api.infrared.city/v2/" + url.pathname.slice("/infrared-api/".length) + url.search;
return fetch(target, { method: request.method, headers, body: request.body });
},
};
```
The SDK has no per-user API key. To limit each user, count in the proxy.
### B. On your server
Use one client for each process. A second client holds the geometry again.
=== "Python"
```python
import os
from infrared_sdk import InfraredClient
client = InfraredClient(api_key=os.environ["INFRARED_API_KEY"])
```
=== "TypeScript"
```ts
import { InfraredClient, initializeCore } from "@infrared-city/infrared-sdk";
await initializeCore(); // threads by default on Node 22+
export const client = new InfraredClient({ apiKey: process.env.INFRARED_API_KEY });
```
- The client keeps the geometry of each facade or roof job in its own memory.
Analyses on the same geometry share one copy.
- Submit and merge with the same client, in the same process. A schedule that
another process merges gives a result with no outline. That process needs a
saved layout.
### Save and reload
Save two things in your own storage:
- The layout, one time for each geometry: `layout.toBytes()` and
`layout.layoutKey`.
- The values of each result: `surfaceColumnsToBytes(columns, { layoutKey })`
(Python: `columns.to_bytes(layout_key=...)`).
To reload, load both (`FacadeLayout.fromBytes`, `surfaceColumnsFromBytes`),
check them with `attachValues`, and call
`surfaceRenderBuffers(columns, { layout })`. To rebuild the layout of an older
run, pass the `surfgridVersion` (`surfgrid_version`) of that run. Leave
`emitCellTris` off: it makes the layout about three times larger. For the
code and the drawing steps, read
[Render buffers in detail](#draw-facade-and-roof-results-fast).
### Reuse uploads across reloads and workers
The SDK keeps the URL of each uploaded tile geometry in memory. A new worker
or a page reload uploads all tiles again. A `geometryUrlStore` that you own
keeps the URLs, so the same geometry is not uploaded twice. With the store, a
repeat run of the same area sends no upload at all: the SDK reads each URL
from the store and posts the jobs at once.
```ts
const geometryUrlStore = {
async get(key: string) { return await idbGet(key); }, // { url, expiresAt } or undefined
async set(key: string, url: string, expiresAt: number) {
await idbPut(key, { url, expiresAt });
},
};
serveSdkWorker({ geometryUrlStore /* , ...other options */ });
```
`idbGet` and `idbPut` stand for your own IndexedDB store.
- One store serves every worker of the session. Two workers that miss the
same tile at the same time both upload it, unless the store also has a
`claim(key)` (for example a Web Lock, see the TypeScript README): then one
worker uploads and the other reads its URL.
- The SDK makes the keys from a digest of the credentials. A renewed token
gives a new key. Keep one store for each user.
- An entry expires after 23 hours. A refused URL is uploaded again by the SDK.
- An entry is a read link: delete the store at sign-out.
- Python keeps URLs in memory until they expire (the link lasts about 24
hours) and has no store option.
### Clean up and limit
- Free the geometry of a schedule that you drop:
`client.jobs.captures.forgetSchedule(schedule)` or
`client.forget_schedule(schedule)`.
- `runAreaAndWait` frees the jobs of a failed or aborted run itself.
- At exit, call `client.jobs.captures.free()` (TypeScript) or `client.close()`
(Python).
- A merge of a large site uses much memory for a short time. A 4 km city
facade run (about 400,000 surfaces) peaked at about 3 GB. Run 1 or 2 merges
at a time in one process, and measure your own sites.
- On Node, the threaded core ends the process only when it runs out of
WebAssembly memory (near 4 GiB). Other core errors are thrown errors.
### Checklist
- The API key is only on your server.
- Browser way: one worker client for each tab.
- Server way: one client for each process.
- The layout is saved one time for each geometry, with its `layoutKey`.
- Abandoned schedules go to `forgetSchedule` (`forget_schedule`).
## Cost and retry
One tile is one billed job. This page shows how to count the jobs before you
run, what happens when a tile fails, and how the SDK keeps a retry from
billing a job two times.

### What is one job
- **Grid analyses**: one job for each tile.
- **Facades**: one job for each building batch.
- **Daylight factor**: one job for each part. Count the parts with
`client.analyses.preview_parts(request)` (Python) or `client.previewParts(request)`.
- **Several analyses**: each family has its own grid, so each has its own
jobs. Solar-family analyses on the same grid and layers share the uploads.
An upload saves time. It does not change the job count.
There is no result cache. The same run again is billed again. A repeat run
with a `geometryUrlStore` skips the uploads. It still bills the jobs.
### Count before you run
Use `preview_area` (`previewArea`). It sends no job.
1. Always give the analysis: `analysis_type=` (`analysisType`) or
`payload=`. Without it, the Python preview uses the wind grid. A solar
count is then about 4 times too high, and you get a warning. TypeScript
requires `analysisType`.
2. Python: price from `would_bill_jobs`, not from `tile_count`. For facades,
give `payload=`.
3. TypeScript: `await previewArea(polygon, { analysisType })` counts tiles.
This is right for a grid analysis. For facades, and to get the job count,
use `await previewAreaBatches(input, polygon, options)`. It reads
`plannedJobCount` from the plan that `runArea` would send. Pass the same
`input` and buildings as the run.
4. For facades, give the same `packing` as the run: `"fast"` can plan a
different number of jobs than `"regular"`.
5. One call prices one analysis. For three analyses, call it three times and
add the results.
6. The price is the API's live price list (`GET /billing/pricing` at the API
root), not a number in the SDK. The cost is the planned jobs times the
price of one job of the analysis; the time is 10 s a job. Each client
keeps the list for 20 minutes. `pricing_source` (`pricingSource`) is
`live`, `cached` or `stale`: `stale` is an older list, used only because
a new fetch failed. With no list and a failed fetch, the preview raises
`PricingUnavailableError`.

### When a tile fails: retry keys
A failed tile does not stop the other tiles. The merge gives no partial map.
A merge (`merge_area_jobs`, `mergeAreaJobs`) raises `AreaRunError` in Python
and an `Error` in TypeScript. `run_area_and_wait` (`runAreaAndWait`) and the
stream raise `AreaRunError` in both SDKs, with the same message (the kernel
writes it). A run past its area timeout raises `AreaTimeoutError`. A status
request that the server refuses for good (401, 403) raises `JobPollError`.
- `run_area_and_wait` (`runAreaAndWait`) and the stream send a failed tile
again as a new job, one time by default (`retries=1`). An analysis that
still has a missing tile gives an error. `retries=0` turns this off.
- A status answer 401 or 403 stops the run (`JobPollError`).
- With `run_area` (`runArea`), you retry yourself:
wait for the jobs first, then use `retry_from=schedule`
(`retryFrom: schedule`). The SDK sends only the tiles that need it.
### Why a tile failed
Each tile in the error (`failed_tiles` in Python, `failedTiles` in
TypeScript) is a `TileFailure` with three fields:
- `kind`: why the tile has no result, as the SDK decided it. Use this field
in your code, not the text. It is `None` (`undefined` in TypeScript) for a
job that is still open at the merge: the engine named no kind for it.
- `status`: the HTTP status of the answer that decided it, when there was one.
- `error`: the text. For a job that the server failed, it is the server's own
message (for example "context needs ground_geometry").
The error text names the `kind` and `status` of each missing tile, and one
advice line for each `kind`. The advice comes from the SDK core: the same
words in Python and TypeScript. `retry_policy()["failure_advice"]`
(`retryPolicy().failureAdvice`) gives the advice for every `kind`.
| `kind` | Meaning | What to do |
|---|---|---|
| `server_failed` | The job ran and the server failed it. | Retry with `retry_from`. If it fails again, report it. |
| `send_refused` | The server refused the submit (a 4xx in `status`). No job. | Do not retry the same input. Change the input or the credentials. |
| `host_refused` | Nothing reached the server: the SDK could not build the request, or could not connect (DNS, connect refused). The error text names the cause. | Change the input, or fix the base URL or the network. |
| `rate_limited` | The server answered HTTP 429 until the area timeout. | Retry later with `retry_from`. |
| `payment_required` | HTTP 402 stopped the run. | Add balance, then retry with `retry_from`. |
| `uncertain` | The server can hold a job for the tile. The SDK does not send it again. | Look at the account's jobs before you retry. |
| `download_failed` | The job succeeded and its result did not download. | Merge again with the same schedule. |
| `timeout` | The area timeout came first. | Merge again to fetch jobs that are done. Retry the others with `retry_from`. |
=== "Python"
```python
from infrared_sdk import AreaRunError
try:
grid = client.merge_area_jobs(schedule)
except AreaRunError as error:
for tile in error.failed_tiles:
print(tile.tile_id, tile.kind, tile.status) # kind is None while open
again = [t for t in error.failed_tiles
if t.kind in ("server_failed", "rate_limited", "timeout")]
```
=== "TypeScript"
```ts
const result = await client.mergeAreaJobs(schedule);
for (const tile of result.failedTiles ?? []) {
console.log(tile.tileId, tile.kind, tile.status); // kind is undefined while open
}
```
### Poll yourself, then merge
`run_area` (`runArea`) does not poll. To ask for the state of the jobs and
then merge, do this:
- Python: pass the same dict to each `check_area_state(schedule, known=known)`,
then to `merge_area_jobs(schedule, known=known)`. A job that is already
finished is not asked about again.
- TypeScript: `checkAreaState` writes each job status into the schedule, and
`mergeAreaJobs` does not ask again about a finished job. Your own map goes in
`mergeAreaJobs(schedule, { known })`.
### The retry limits
`retry_policy()` (`retryPolicy()`) gives the limits the SDK uses: the sends of
one submit, the attempts of one tile, and the advice for every `kind`. They
are read-only. An HTTP 429 is
sent again after the server's `Retry-After`, with no count limit, until the
area timeout.
The other requests of the SDK use the same rule, with a small count limit:
the check of the binary route, the geometry upload and a read of public data
(weather files, tile data). A 429, a 5xx or a dropped connection is tried
again, at most 3 times (the upload: 5 times), after the server's
`Retry-After` when it sends one. When the host cannot be reached at all (a
DNS error, a refused connection), the SDK stops at once and the error names
the cause.
### Keys: no double bill
Each job has an idempotency key. One key gives at most one job.
- **Answer not sure** (the network drops it, a timeout, a reset, a redirect,
HTTP 408, 409 or 5xx): the SDK sends the same key again.
`run_area_and_wait` and the stream do this until the area timeout.
`run_area` sends up to 6 times in all. The server returns the job it
already has.
- **Nothing left the client** (the host name does not resolve, the connect
is refused, an upload or presign fails before the send): no job can exist.
The SDK sends the same key at most 3 times in all, 0.25 s and 0.5 s apart,
then the tile fails with the kind `host_refused` and the cause. If an
earlier send of the key was not sure, the rule above applies.
- **Failed or refused**: the retry gets a new key and makes a new job. A
refusal after a send that was not sure keeps the key: the tile is
uncertain, and a retry sends the same key again.
- **Batch submit**: each job in a batch has its own key, so these rules
apply to each job. A batch with no answer (or a 429 or 5xx for the whole
batch) is sent again with the same keys: the server returns the jobs it
already made and bills nothing again. A job that the batch answers with
429 or 5xx is sent again with its key. A job that the batch refuses is
sent alone, and the single request decides.
### No credits (402)
On HTTP 402 the SDK sends no more jobs and does not retry. Jobs that the
cloud has already accepted still finish and bill. Add credits, then retry.
### Example: count and retry
=== "Python"
```python
preview = client.preview_area(polygon, analysis_type="solar-radiation")
print(preview.would_bill_jobs) # price from this number
schedule = client.run_area(payload, polygon, buildings=my_buildings)
# ... some tiles failed: send only those again
schedule = client.run_area(payload, polygon, buildings=my_buildings,
retry_from=schedule)
```
=== "TypeScript"
```ts
const preview = await client.previewAreaBatches(input, polygon, { buildings: myBuildings });
console.log(preview.plannedJobCount); // price from this number
let schedule = await client.runArea(input, polygon, { buildings: myBuildings });
// ... some tiles failed: send only those again
schedule = await client.runArea(input, polygon, {
buildings: myBuildings, retryFrom: schedule,
});
```
#### Learn more
- [How a run works](#how-a-run-works)
- [Tiling](#tiling)
- Python: [the client](python/sdk.md), `preview_area` and `run_area_and_wait`.
- TypeScript: [the SDK reference](api/typescript/index.md), `previewArea` and `runAreaAndWait`.
## Draw facade and roof results fast
A facade or roof run gives one value for each cell of each surface. To draw
these cells, you do not need one mesh for each cell. Use the **render
buffers**. They are a few flat arrays that any renderer can read.
Use the render buffers when you draw a facade or roof result on screen, in
deck.gl, three.js or raw WebGL.
### What the render buffers are
A surface result has many **frames**. A frame is one flat region (a wall or a
roof part) with a regular grid of cells. The buffers hold:
| Buffer | Type | Meaning |
|---|---|---|
| `anchor` | f64 x 3 | Centre of the run. Add it back in 64-bit floats. |
| `frames` | f32 x 9 for each frame | `corner`, `uStep` and `vStep`, relative to `anchor`. |
| `dims` | u32 x 3 for each frame | Columns `nu`, rows `nv`, and `cellStart` (the first cell of the frame in `values`). |
| `outline` | f32 x 6 for each triangle | The triangles of each frame, as `s0 t0 s1 t1 s2 t2`. |
| `outlineOffsets` | u32 x (frames + 1) | Frame `f` owns the triangles `outlineOffsets[f]` to `outlineOffsets[f + 1]`. |
| `values` | f16 or f32 for each cell | The value of a cell. `0` when the cell has no value. |
| `validity` | u8, one bit for each cell | Cell `k` is bit `k & 7` of byte `k >> 3`. A set bit means the cell has a value. |
| `valueMin`, `valueMax`, `anyValid` | numbers | The range over the cells that have a value, for your colour scale. |
Important points:
- **The format does not depend on a renderer.** It is plain arrays.
- **One outline for each frame.** You draw the outline triangles of a frame.
The outline gives the exact border of the surface. There is no mesh for each
cell, so the buffers are small.
- **Outline coordinates are in cell units.** A point `(s, t)` of the outline is
at `corner + s * uStep + t * vStep`. A cell `(i, j)` covers `s` from `j` to
`j + 1` and `t` from `i` to `i + 1`.
- **Values keep their native type.** The server sends half floats (`f16`) for
solar radiation, sky view factor, thermal comfort statistics and UTCI (UTCI
since 2026-10-07, with no divisor). It sends 32-bit floats for sun hours and
daylight availability. UTCI results saved before 2026-10-07 hold integers
with a divisor of 10; the buffers divide them. The buffers give `f16` for
`f16` results and `f32` for all others. Nothing is widened to 64 bits.
- **Validity is a separate bit.** A cell with no value (for example, a cell
under terrain) has `values[k] = 0` and a clear validity bit. Values are never
NaN or infinite. Test the bit, not the value.
### Get the buffers
#### TypeScript
```ts
import {
InfraredClient, initializeCore, surfaceRenderBuffers, type SurfaceColumns,
} from "@infrared-city/infrared-sdk";
await initializeCore();
const client = new InfraredClient({ apiKey: process.env.INFRARED_API_KEY });
// A facade run returns SurfaceColumns. `runAreaAndWait` is typed for every
// analysis, so narrow the result.
const columns = (await client.runAreaAndWait(
{ analysisType: "sky-view-factors", analysisSurfaces: "facades", surfaceGridSize: 3 },
polygon,
{ buildings },
)) as SurfaceColumns;
const buffers = surfaceRenderBuffers(columns);
console.log(buffers.valueDtype, buffers.values.length, buffers.valueMin, buffers.valueMax);
```
`valueDtype` is `"f16"` or `"f32"`. For `"f16"`, `values` is a `Uint16Array` of
half-float bits. Node 18 to 22 has no `Float16Array`, so the SDK always gives
bits.
#### Python
```python
from infrared_sdk import InfraredClient
from infrared_sdk.analyses.types import SvfModelRequest
client = InfraredClient(api_key="...")
payload = SvfModelRequest(
analysis_type="sky-view-factors",
analysis_surfaces="facades",
surface_grid_size=3.0,
)
result = client.run_area_and_wait(payload, polygon, buildings=buildings)
buffers = result.columns.render_buffers()
print(buffers.values.dtype, buffers.values.shape, buffers.value_min, buffers.value_max)
```
For `float16` input, `buffers.values` is a `float16` array. Python names are
snake case: `u_step`, `outline_offsets`, `value_min`, `any_valid`.
### Live result and saved layout
The outline comes from the **layout** of the surfaces: the frames and the
borders, which depend only on the geometry. There are two ways to get it.
- **Live result.** After a run in the same client, the result holds the
outline and its `layoutKey` (`layout_key`): every analysis and run on the
same geometry, surface settings and packing has the same key, so build the
mesh and buffers one time for each key and change only `values`. Call `surfaceRenderBuffers(columns)` or `columns.render_buffers()`.
You must merge the run in the client that submitted it. A schedule that you
merge in another process has no outline, and the call throws an error that
names the missing outline.
- **Saved layout.** Save the layout once (`layout.toBytes()` or
`layout.to_bytes()`). Later, load it (`FacadeLayout.fromBytes`,
`FacadeLayout.from_bytes`) and pass it in. The outline of each surface comes
from the layout, by surface id.
```ts
import { FacadeLayout, attachValues, surfaceRenderBuffers } from "@infrared-city/infrared-sdk";
const layout = FacadeLayout.fromBytes(savedBytes);
attachValues(layout, columns, { expectedLayoutKey: savedLayoutKey }); // throws on a mismatch
const buffers = surfaceRenderBuffers(columns, { layout });
layout.free();
```
```python
from infrared_sdk.facade_layout import FacadeLayout, attach_values
layout = FacadeLayout.from_bytes(saved_bytes)
attach_values(layout, columns, expected_layout_key=saved_layout_key) # raises on a mismatch
buffers = columns.render_buffers(layout=layout)
```
Save the values of each result as one blob, and link it to the layout by
`layoutKey`:
```ts
const blob = surfaceColumnsToBytes(columns, { layoutKey: layout.layoutKey });
// later:
const { columns, layoutKey } = surfaceColumnsFromBytes(blob);
attachValues(layout, columns, { expectedLayoutKey: layoutKey! });
```
```python
blob = columns.to_bytes(layout_key=layout.layout_key)
# later:
columns = SurfaceColumns.from_bytes(blob)
attach_values(layout, columns, expected_layout_key=columns.layout_key)
```
The blob holds the values in their native type, and no outline. A Python
blob has no legend and no aggregates (Python columns have none). A reader
refuses a blob of a version it does not know. `attachValues` refuses a layout
that does not match the result. The saved outline is
quantized. It is at most `nu / 131070` cells (`nv / 131070` for the other
axis) from the live outline.
A layout from `synthesizeFacadeLayout` or `FacadeLayout.toBytes()` does not
hold the per-cell triangles unless you set `emitCellTris: true`
(`emit_cell_tris=True`). Do not set it to draw with render buffers. It makes
the layout about three times larger.
A layout depends on the geometry of its own building only. A neighbour, a
building of the same job and the `contextGeometry` you sent with the run do
not remove a cell, so you can rebuild one building alone. To rebuild a run from
surfgrid v8 (`surfgridVersion` 8), a job with `activeIds` (`active_ids`) reads
the buildings near its targets as context, as the live job of a tile does at
v8: a cell inside, or in contact with, a closed solid of another building is
dropped. Pass every building of the run to `synthesizeFacadeLayout` for that
case, not only the targets.
A layout saved by an older SDK (format version 2) has no outline. Loading it
fails with `layout v2 has no outline; re-run the analysis`. Save the layout
again.
### Draw with deck.gl, three.js or WebGL
The renderer draws the outline triangles of each frame. The fragment shader
finds the cell and reads its value. This is a summary, not a full renderer.
1. **Positions.** For each outline vertex `(s, t)` of frame `f`, the position is
`corner_f + s * uStep_f + t * vStep_f`. All three are in `frames`, relative
to `anchor`. Do this once on the CPU in 32-bit floats. The error is about
0.25 mm at 2 km from the anchor.
2. **Cell coordinates.** Give `(s, t)` to the shader as a varying. The
`outline` array is already a ready attribute: two floats for each vertex.
3. **Frame data.** Give `nu`, `nv` and `cellStart` of the frame to each vertex
as an unsigned integer attribute (flat varying).
4. **Cell lookup.** In the fragment shader:
`j = clamp(floor(s), 0, nu - 1)`, `i = clamp(floor(t), 0, nv - 1)`,
`k = cellStart + i * nu + j`.
5. **Value and validity.** Upload `values` as a texture (`R16F` with
`HALF_FLOAT` for `f16`, `R32F` for `f32`). Upload `validity` as an `R8UI`
texture. Read cell `k`, test bit `k & 7` of byte `k >> 3`, discard the
fragment or draw a neutral colour when the bit is clear, and map the value
with `valueMin` and `valueMax`.
6. **Double-sided.** Draw frames with both faces. A wall can face any way.
7. **Position in the scene.** Put `anchor` in the model transform in 64-bit
floats (three.js: set the mesh position; deck.gl: use `METER_OFFSETS`
coordinates with `anchor` as the origin). Keep one run to one site. Frames
that are kilometres apart make the f32 corners less accurate.
This code builds the vertex arrays from the buffers (TypeScript). It runs
as it is:
```ts
import type { SurfaceRenderBuffers } from "@infrared-city/infrared-sdk";
function vertexArrays(b: SurfaceRenderBuffers) {
const frames = b.dims.length / 3;
const vertices = b.outline.length / 2;
const position = new Float32Array(vertices * 3); // relative to b.anchor
const frameDims = new Uint32Array(vertices * 3); // nu, nv, cellStart
for (let f = 0; f < frames; f += 1) {
const [cx, cy, cz, ux, uy, uz, vx, vy, vz] = b.frames.subarray(9 * f, 9 * f + 9);
for (let v = 3 * b.outlineOffsets[f]; v < 3 * b.outlineOffsets[f + 1]; v += 1) {
const s = b.outline[2 * v];
const t = b.outline[2 * v + 1];
position.set([cx + s * ux + t * vx, cy + s * uy + t * vy, cz + s * uz + t * vz], 3 * v);
frameDims.set(b.dims.subarray(3 * f, 3 * f + 3), 3 * v);
}
}
return { position, cell: b.outline, frameDims }; // `cell` is (s, t) for each vertex
}
```
### Memory
- **Buffers are yours.** Each array owns its memory. In TypeScript you can
transfer them to a worker (`postMessage(msg, [buffers.frames.buffer, ...])`).
They stay valid when WebAssembly memory grows. In Python they are NumPy arrays.
- **The outline arrays are your own.** `buffers.outline` and
`buffers.outlineOffsets` are the same objects as `columns.outline` and
`columns.outlineOffsets`. The SDK does not copy them. If you transfer them,
the columns lose them. Do not change them.
- **Values are not widened.** `f16` takes 2 bytes for each cell, `f32` takes 4.
- **Free what the client keeps.** The client keeps the capture of each facade
or roof job until you merge the run. If you will not merge a schedule, call
`client.jobs.captures.forgetSchedule(schedule)` (TypeScript) or
`client.forget_schedule(schedule)` (Python). When you finish with the client
in TypeScript, call `client.jobs.captures.free()`. In Python, `client.close()`
(or leaving a `with` block) clears the kept captures. Call `layout.free()` for each
`FacadeLayout` in TypeScript.
For servers that draw for many users, see
[Serve many users](#serve-many-users).
## Configuration and limits
### Environment variables
Each setting resolves in this order: constructor argument, environment
variable, default. The SDK does not read `.env` files.
| Variable | SDK | Sets | Default |
|---|---|---|---|
| `INFRARED_API_KEY` | both | Your API key | none (required) |
| `INFRARED_BASE_URL` | both | Gateway URL | `https://api.infrared.city/v2` |
| `INFRARED_GEOMETRY_REF_ENABLED` | both | `false` turns off geometry reuse between jobs | on |
| `INFRARED_APPLICATION` | Python | Calling surface (`application=`) | `sdk` |
| `INFRARED_SDK` | Python | Calling library and version (`sdk_id=`) | `infrared-sdk/` |
| `INFRARED_QUIET` | Python | Hides the one-time start-up INFO log | unset |
| `INFRARED_SDK_DEBUG` | Python | More diagnostic output | unset |
| `INFRARED_OVERTURE_TRANSPORT` | Python | Overture read path: `auto`, `s3` or `https` | `auto` |
In TypeScript, pass `env` in the client config to give these values without
`process.env`. A value in `env` has priority.
### Identify your application
The SDK sends two headers with each call: `x-infrared-application` (the
surface that made the call) and `x-infrared-sdk` (the library and its
version). If you build a plugin or a connector, set them. Then your traffic is
not counted as generic SDK traffic. Your value is added in front of the SDK
token, so the SDK version stays visible.
=== "Python"
```python
client = InfraredClient(api_key=key, application="qgis", sdk_id=f"infrared-qgis/{version}")
```
=== "TypeScript"
The TypeScript client sets `x-infrared-sdk` itself. You choose only the
surface, from a fixed list of names (default `script`).
```ts
const client = new InfraredClient({ apiKey, surface: "qgis" });
```
### Limits
| Limit | Value | When it is broken |
|---|---|---|
| Non-empty tiles in one run | 100 | The run is refused before any job. Pass `max_tiles_override` (Python) or `maxTilesOverride` (TypeScript), and read the price first. |
| Own sensor points in one job | 300,000 | The payload is refused when you build it. |
| Facade sensors in one batch | 250,000 with `packing="regular"`; 290,000 with `"fast"` (targets) | The SDK plans more batches. |
| Terrain triangles | 500,000 | The server refuses the job. |
| Triangles in one tile scene | 5,000,000 (all layers) | The server refuses the job (HTTP 422). |
| Size of one request | 64 MiB | The server refuses the job (HTTP 413). |
| `context_geometry` | about 50,000 triangles for the whole site | The SDK logs a warning. |
| Context triangles in one tile job | 250,000 | The SDK refuses the run. Simplify the context or use a smaller `context_reach_m`. |
| Local coordinates | below 100,000 m | Use local metres, not UTM. |
### Material and building properties
These are the properties you can set. Python uses snake case. The wire and
TypeScript use the kebab-case or camelCase name (`ach_infiltration` is
`ach-infiltration`; `wall_albedo` is `wallAlbedo` in TypeScript). In
TypeScript, the energy balance and daylight factor have no typed classes:
send the wire keys.
**Energy balance** (`EnergySettings`, see [Interior](#interior-beta)). All
fields are optional. The settings apply to the whole request.
| Property | Default | Unit |
|---|---|---|
| `u_values.ext_wall`, `flat_roof`, `ground_floor` | 0.13, 0.25, 0.30 | W/m²K |
| `glazing.u_value` (centre of glass) | 1.1 | W/m²K |
| `glazing.shgc` | 0.60 | 0 to 1 |
| `glazing.frame_fraction` | 0.15 | 0 to 1 |
| `glazing.frame_u_value` | 1.4 | W/m²K |
| `glazing.edge_psi` | 0.06 | W/mK |
| `occupancy.heating_setpoint`, `cooling_setpoint` | 21, 26 | °C |
| `occupancy.people_gains`, `lighting_gains`, `equipment_gains` | 1.6, 1.5, 2.0 | W/m² floor |
| `occupancy.ach_natural` | 0.5 | air changes per hour |
| `ach_infiltration` | 0.03 | air changes per hour |
| `construction_class` (thermal mass) | `"medium"` | `very-light`, `light`, `medium`, `heavy`, `very-heavy` |
| `thermal_bridge_surcharge` | automatic | W/m²K |
| `ground_reflectance` (albedo of the ground) | 0.2 | 0 to 1 |
| `ground_level_z` | 0.0 | m, absolute z |
| `operation` (`Operation.continuous()` or `.intermittent(hours, days)`) | continuous | hours `[start, end]`, days `"weekdays"` or `"all"` |
| `solar_model` | `"legacy-flat"` | `"legacy-flat"` or `"irradiance"` |
The model picks the U-value key from the height of a slab or wall in its zone
(roof at the top, ground floor at the bottom, else wall). An unknown
`construction_class` counts as `medium`. With an intermittent `operation`,
give the gains and `ach_natural` as averages for the hours the plant runs.
You cannot set a value for one wall or one window. There is no emissivity
setting in this model.
**Daylight factor.**
| Property | Default | Note |
|---|---|---|
| `room_reflectances` (`floor`, `walls`, `ceiling`) | 0.2, 0.5, 0.7 | Set it for the whole request. |
| `glazing_transmittance` | 0.63 | For a window with no `opening_factor`. |
| `opening_factor` (in `interior_entities`) | none | Light transmittance of one window, 0 to 1. |
| `exterior_ground_reflectance` | none | The server reads it, but it has no effect on the result. |
**Outdoor thermal comfort** (`thermal-comfort-index` and
`thermal-comfort-statistics` only; the other models refuse these fields).
Leave a field unset to use the model default. Python names:
| Property | Range | Note |
|---|---|---|
| `wall_albedo` | 0 to 1 | All walls. |
| `wall_absorptivity` | 0 to 1 | All walls. Server default 0.75. A building can carry its own `absorptivity` on its entry in `buildings`. |
| `ground_albedo` | 0 to 1 | All ground, over the table of each material. |
| `ground_dt_max` | 0 to 50 K | Largest day lift of the ground surface temperature. |
| `canopy_transmissivity` | 0 to 1 | All trees. A tree can carry its own `transmissivity` in its GeoJSON `properties`. The built-in leaf-on value is 0.03 (palm 0.30). |
The first matching value wins: the entry of one building or tree, then the
request-wide field, then the built-in value.
**Ground materials are fixed on the server.** The SDK layers are `asphalt`,
`concrete`, `water`, `soil` and `vegetation`. Each name has a built-in albedo
and a temperature lift in the model, and the SDK cannot read them. An
`albedo` or `dt-max` in the properties of a ground feature is ignored: only
the geometry and the name count. To change the albedo, use `ground_albedo`
for the whole request. The SDK has no field for emissivity (the wall
emissivity is fixed on the server at 0.90).
Tree leaf-off values are in [Leaf-off vegetation](#leaf-off-vegetation).
### Leaf-off vegetation
A tree with no leaves lets more sun through. The SDK decides leaf-on or
leaf-off for each sun hour, from its month and the site latitude.
- North of 23.5 deg N: leaf-off from November to March. South of 23.5 deg S:
from May to September. In the tropics, a tree is always leaf-on.
- It changes `daylight-availability`, `direct-sun-hours` and
`solar-radiation`. `sky-view-factors` always uses leaf-on.
- A deciduous tree lets 0.45 of the direct beam through when bare. Evergreen
trees (conifer, palm) keep their leaf-on value all year.
- An unknown genus counts as broadleaf deciduous.
- To change one tree, set `"transmissivity-leaf-off"` (0 to 1) in its GeoJSON
`properties`:
```python
for f in trees.features:
if f["properties"].get("genus") == "tilia":
f["properties"]["transmissivity-leaf-off"] = 0.6
```
### Grid images
- Python: `sdk.weather.gen_grid_image(grid=..., analysis_type=..., criteria=...)`
gives a PNG in the process.
- TypeScript: `await renderGridPng(grid, { analysisType, criteria })` gives a
PNG, one pixel per cell, up to 960 px on the long side.
### TypeScript project setup
- Use TypeScript 5.8 or later. Types compile with `strict` and without
`skipLibCheck`. ESM-only projects also work from 5.4.
- Set `module` and `moduleResolution` to `NodeNext` or `Bundler`. `Node10`
does not work, because it cannot read the package `exports`.
- CommonJS `require()` works for the root entry only, and needs TypeScript 5.8.
- If you set `lib` by hand, keep `DOM` or add `@types/node`.